March 12, 2011
Button up for Spring! # 2
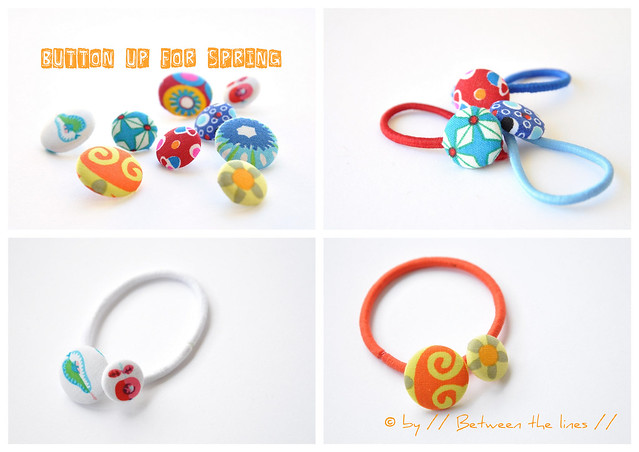
I may have sounded a bit too enthusiastic when I announced there would be a second part to the Button Up for Spring from last post. So, let's hope you're not too disappointed. It's just what is: another set of hair accessories for my poor girls, whose mom can't do more than make a pony tail or two, or a braid if she's in a good mood, ... LOL
Blame it to my own miserable hair and the fact I never ever had long hair as a child just because of that reason. In those days it was widely believed that keeping hair short would make it stronger and thicker in the end, just like covering it in egg, while shampooing, would make it stronger, as would rinsing it with beer and shampoo it again - I can tell you: these remedies don't work, my hair's still miserable, but no longer short!
Anyway, when I made these fabric covered buttons, all I could come up with to attach them too was elastic hairbands. Because you see, I had to make my own fabric covered buttons. You see them showing up everywhere and I just had to try it! And they're fun to make!
I bought two kits for covering buttons - I bought the first one a while back but forgot about it and then I had already bought a second one when the first one showed up again in one of my many not so well organized boxes. Good thing (or is it a bad thing - I guess it doesn't really matter) they were of a different size. Anyway!
Last week, I also bought a bag or two of Petit Pan fabric scraps. All excuses are good. Here's mine: I like their designs, I just have a little trouble with color in my own projects. Colors intimidate me. I like colors and colorful fabric, but it also scares me. I can't deal with it, it seems like, too afraid to overdo things, to create chaos or to waste my pretty fabric. The advantage of working with scraps, however, is that with little pieces you can add a little touch of color here and there without it becoming too overwhelming (for me). And I like buying scraps because of the surprise aspect too - it's like unwrapping a present. So, now you know everything!
And how did I make the hair accessories?
It's very simple: First, start by covering your buttons, however, keeping in mind:
1. to cut your fabric big enough otherwise it will stick out on the sides - I know this because I made that mistake twice (!). Luckily, I managed to open up the button again, bend the metal to its initial form with my mini pliers, after witch I started all over again with a bigger piece of fabric - too bad for that nice little detail that went lost...
2. when using a print where orientation matters, make sure to attach the plastic backing such way that the print points the right way (my apples and pears buttons have a slight twist...)
After covering your buttons, attach them to the elastic hairbands.
How? By sewing them on, of course! I wasn't that smart at first. For the single buttoned elastics, I cut open the elastic (!) and had the hardest time to slide the button on, after which I had to make an ugly knot in the elastic, which the button barely covers - it took me three buttons and a night of sleep to realize my stupidity, go figure! I guess I should stop doing this kind of things after midnight...
Well, that's a long post for just a set of simple hairbands! I hope you didn't mind...
Wishing you a great weekend!
xo, P.


